Recently I started working on a project that required me to have the backend part installed locally, instead of using a remote backend. The project uses Maven as a build tool and it deploys the code to a Tomcat server.
I got cracking and started configuring the project on my local machine. The first thing I noticed is that Intellij IDEA Community does not have a Tomcat plugin, unlike the Ultimate edition, that has one out of the box.
Many Google searches later I found a few plugins that might do the trick but when I tried using them, the famous NullPointerException happened and I started looking for an alternative. I found some inspiration on Github, but not in the form I wanted, but it was good enough to get me started.
Bellow is a short tutorial on how to setup Tomcat in Intellij IDEA Community to run/debug, and how to use Maven to build your project and then deploy it to Tomcat.
Prerequisites
- Install Intellij IDEA Community.
- Install Tomcat - For my project I've used Tomcat 8. You can get it from here.
- Install Maven.
Tomcat Configuration
Make sure you install Tomcat in a place that doesn't require admin access, for example next to your project.
After that, open File -> Settings and expand Tools and select External Tools.
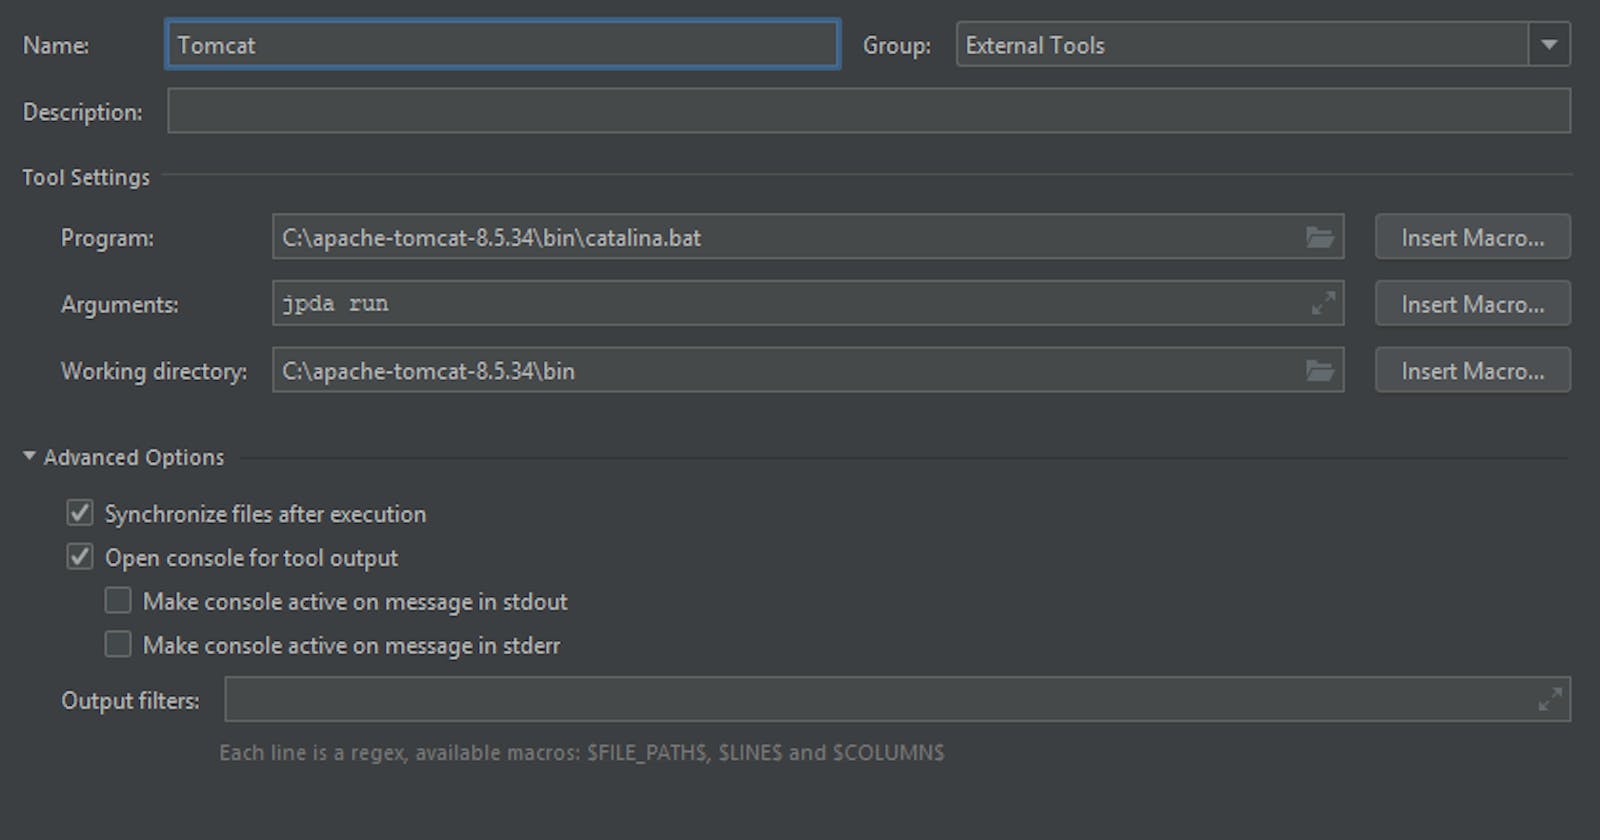
You can add a new tool with whatever name you want. I named mine, Tomcat. For tool settings, select the catalina.bat file, usually located in the bin folder of your Tomcat installation. For example mine is C:\apache-tomcat-8.5.34\bin\catalina.bat. And last but not least set an argument with the command jpda run. The working directory should be set automatically.
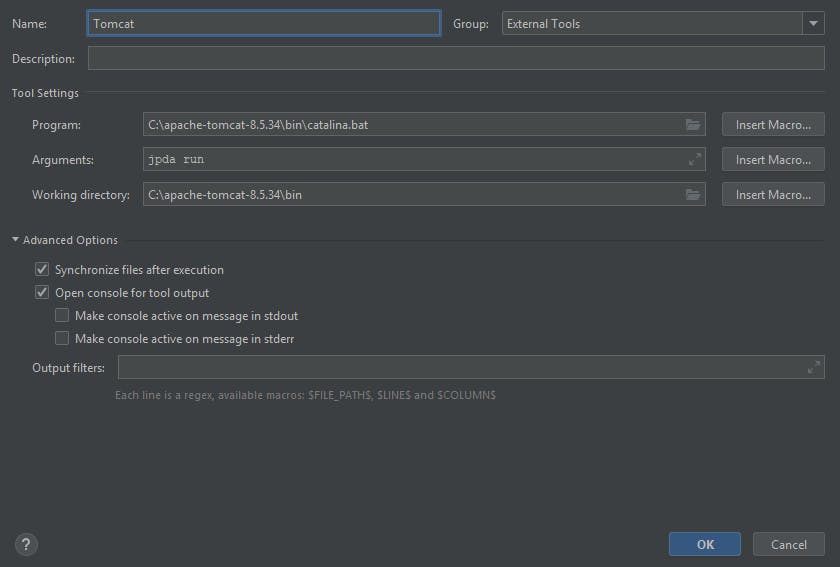
Tomcat External Tool
Start Tomcat
If you go to Tools -> External Tools and click on Tomcat, it should start the Tomcat server.
Maven build and deploy to Tomcat
Now that you're done with the Tomcat configuration you want the ability to build using Maven and deploy to the now working Tomcat server.
To achieve this you'll need to head over to Run -> Edit Configurations, click the "+" and select Maven. Don't forget to name your new configuration. Select your project location and add the following command line.
war:war org.codehaus.mojo:wagon-maven-plugin:upload-single -Dwagon.fromFile=D:\work\project\backend.war -Dwagon.url=file://C:\apache-tomcat-8.5.34\webapps\
What this line does is that it builds the project, using Maven, and then gets the file from the specified path (that's usually configured in your project) and copies it to the webapps folder in Tomcat. Tomcat then knows it has a new version of the file and redeploys it.
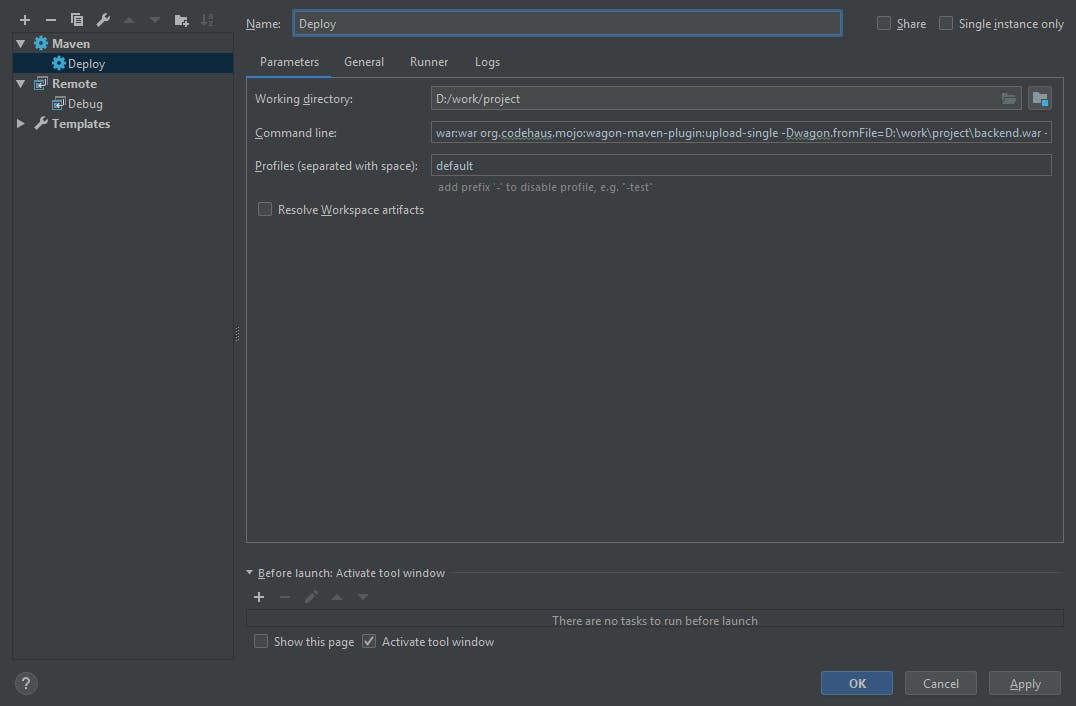
Build and deploy to Tomcat
Tomcat Remote Debug
Like all applications you want the ability to debug your backend. To achieve this you'll need to add a new configuration like the previous step. The only difference this time is that when you click "+" you'll need to select Remote.
Give your configuration a name. You'll need to set the Debugger mode to Attach to remote JVM, the Transport to Socket, the Host to localhost and lastly the Port to 8000. That way when you start the configuration, Intellij will connect via Socket to the Tomcat server that emits via port 8000. You can change the port for Tomcat, to something else, in the Tomcat server.xml file, in the config folder.
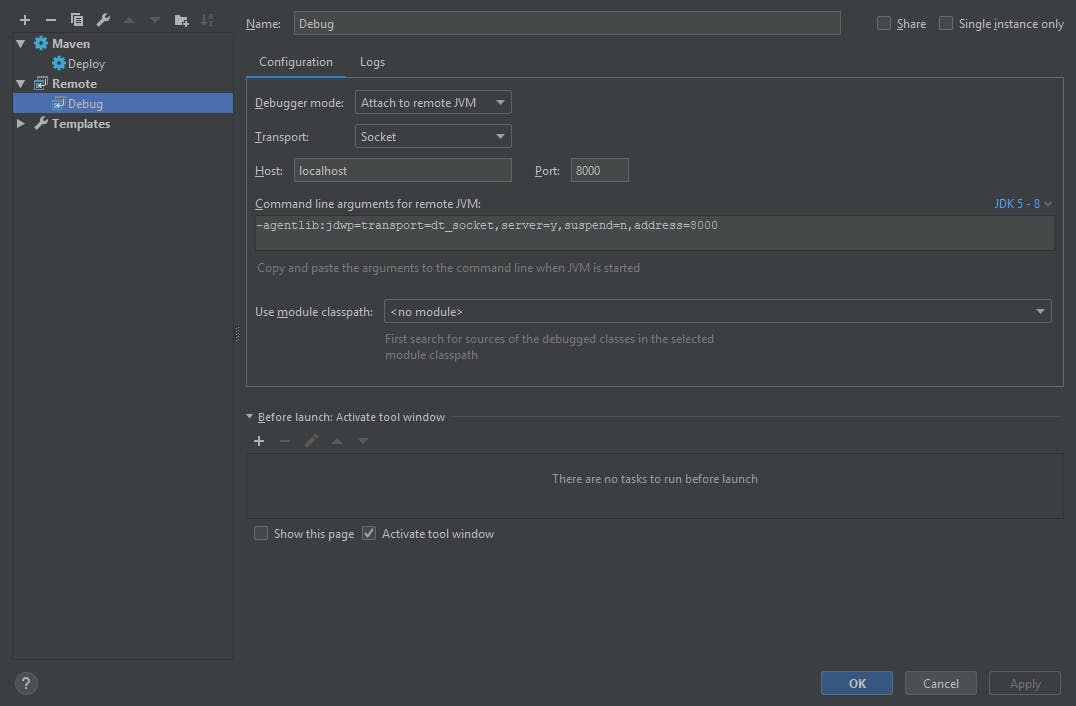
Tomcat Remote Debug
Once the Tomcat server is started you can run this configuration. Just click on Run -> Debug and then select the newly created configuration.
If you want to keep a record of all the logs when debugging, you can achieve this by going to the Logs tabs in the newly created Remote configuration and set the Save console output to file to the logs folder of your Tomcat installation. In my case it was C:\apache-tomcat-8.5.34\logs*.*.
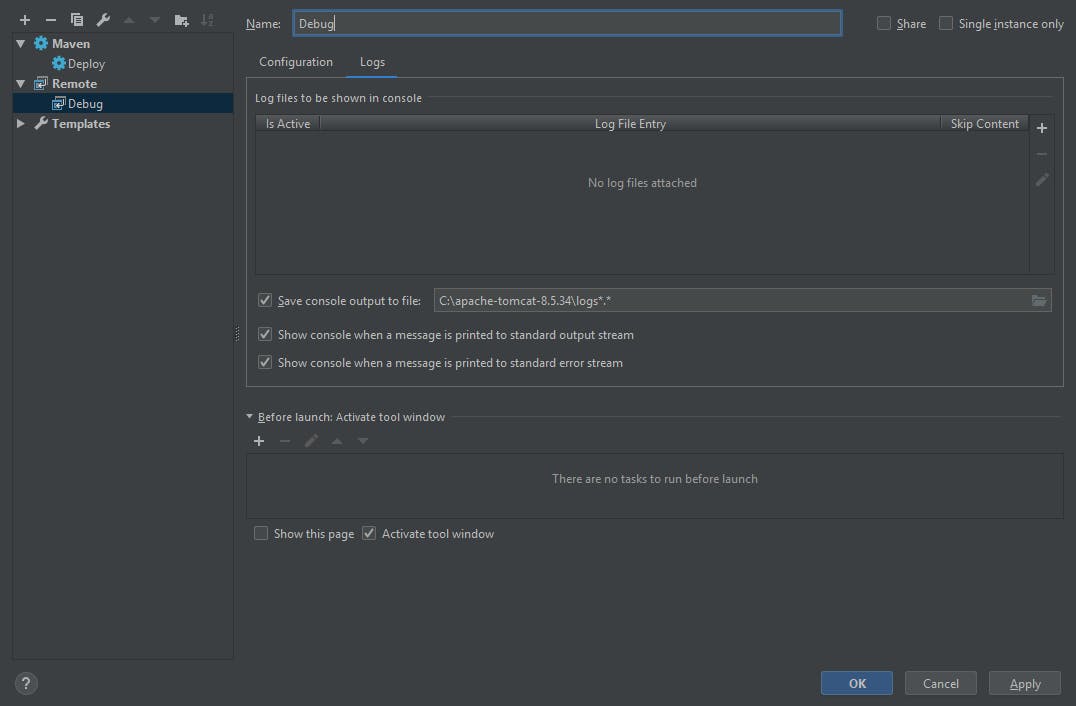
Tomcat Remote Debug Logs
That is it. @ me on Twitter if you think I've missed something or if there is another way of doing this without installing Eclipse or purchasing the Ultimate edition of Intellij IDEA.
Until next time, code long and prosper!
